Can I use React on WordPress? Absolutely. You can combine these two technologies in several ways. You might add React components to your existing WordPress theme, or go all-in with a headless setup where WordPress manages your content and React powers your frontend.
This combination gives you WordPress’s familiar content management system paired with React’s ability to create fast, interactive user experiences. Think real-time updates, smooth animations, and dynamic content that responds instantly to user actions.
In this guide, we’ll explore different WordPress-React integration approaches, provide step-by-step setup instructions with code examples, and cover authentication, performance, and SEO considerations to help you build modern, interactive web applications. We’ll focus primarily on the REST API method (recommended for beginners) with GraphQL as an advanced alternative for users requiring more sophisticated data fetching.
What is React and why use it with WordPress?
ReactJS is an open-source JavaScript library developed by Meta that makes building user interfaces (UIs) for your website a breeze.
It’s different from using a JavaScript framework. A JavaScript framework, like Vue or Svelte, usually gives you a full set of rules and tools to build your app, such as routing and data fetching. However, it is inflexible when it comes to how you structure your code.
On the other hand, React is a UI library that provides tools and features needed to build interactive components, but it lets you decide how to structure your entire app; you decide how to build things, and you can add other tools, like routing and data fetching, when you need them.
Moreover, React uses a unique syntax called JSX, that fuses JavaScript and HTML, which makes it easy to read and code with.
Here’s a summary of the main features of React, its benefits, and applications:
| Feature | Explanation | Main benefit |
| Declarative syntax | Allows developers to describe how the UI should look for different states of the application. | Improves predictability and understanding of UI. |
| Component-based architecture | Applications are built using reusable components, each with its own logic and rendering. | Easier to manage and scale applications. |
| Virtual DOM | Optimizes updates to the actual DOM by updating a virtual DOM and then applying changes to the real DOM. | Improves performance and efficiency. |
| JSX (JavaScript XML) | A syntax extension that allows HTML to be written within JavaScript code. | Easier to understand and debug code. |
| Unidirectional data flow | Data flows in a single direction through the application, making managing and predicting state changes easier. | Predictable and manageable state changes. |
| Lifecycle methods | Components have methods that are called at different stages of their lifecycle, providing hooks for running code. | Fine-grained control over component behavior. |
| Hooks | Allows use of state and other features without writing a class. | Simplifies the use of state and features. |
| Context API | Allows to share values across the application without passing props through multiple layers. | Simplifies state management in large applications. |
| Server-Side Rendering (SSR) | Supports rendering React components on the server to improve performance and SEO. | Improves performance and SEO. |
| React Native | Framework for building mobile applications using React. | Applies React knowledge to mobile development. |
| Rich ecosystem and community | Provides access to numerous resources, third-party libraries, and community support. | Access to resources and support. |
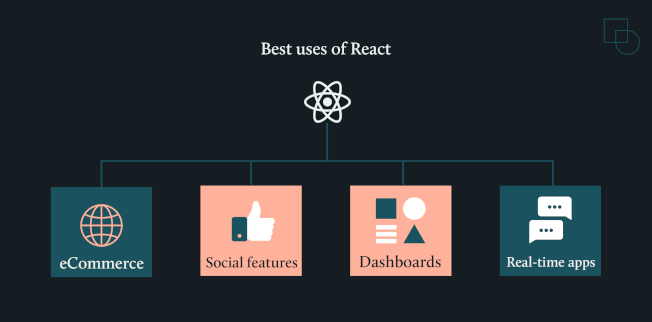
Best uses of React
React excels in creating interactive dashboards, dynamic user interfaces, and real-time features like live chat systems, social media feeds, and eCommerce product filters. Its component-based architecture makes it ideal for building reusable UI elements that maintain consistent behavior across your application.
Why React works well with WordPress
Combining React with WordPress offers the best of both worlds: WordPress provides robust content management, user authentication, and plugin ecosystem, while React delivers modern, fast, and interactive user experiences. This combination allows you to maintain WordPress’s familiar backend while creating cutting-edge frontends that can compete with any modern web application.
WordPress-React integration approaches
Before diving into implementation, let’s explore the different ways you can integrate React with WordPress.
What is headless WordPress?
Headless WordPress, also called decoupled WordPress, separates your content management from the frontend display. Think of it as splitting your website into two parts: WordPress handles content creation, user management, and all the backend functionality you’re familiar with, while React takes over the frontend experience that visitors see.
In a traditional WordPress setup, the same system manages content and displays it. With headless WordPress, you create and manage content in the WordPress admin, but that content gets delivered through APIs to your React application. This means your editors and other content creators can still use the WordPress interface they know, while developers have complete freedom to build modern, fast frontends.
The main benefits include better performance, enhanced security (since the frontend is separate from WordPress), and the ability to use the same content across multiple platforms like websites, mobile apps, or even digital displays.
REST API vs. WPGraphQL Comparison
WordPress offers two main ways to access your content programmatically: the built-in REST API and WPGraphQL (which requires a plugin).
WordPress REST API comes standard with every WordPress installation. It follows REST principles, making it familiar to most developers. You make HTTP requests to specific endpoints to get posts, pages, users, or custom content. Each request typically returns a full dataset, which is simple but can include unnecessary data.
WPGraphQL requires installing a plugin that introduces support for GraphQL and but offers more sophisticated data fetching compared to REST. Instead of multiple API calls, you can request exactly the data you need in a single query. For example, if you want post titles and featured images (but not content), GraphQL lets you specify exactly that, reducing data transfer and improving performance.
When to choose each approach
- Choose headless WordPress with React when you need maximum design flexibility, want to build for multiple platforms, or require superior performance. It’s ideal for complex web applications and progressive web apps.
- Stick with traditional WordPress plus React components when you want to enhance specific parts of your existing site without a complete rebuild, or when content editors need WordPress’s preview functionality.
- Use the REST API for simpler projects and rapid prototyping.
- Choose WPGraphQL for complex applications with multiple content types or when you need to optimize data fetching performance.
For this tutorial, we’ll demonstrate both approaches, starting with REST API as the primary method, followed by a GraphQL setup for those who prefer its advanced querying capabilities.
What tools do you need to build a web app with React and WordPress?
Using React and WordPress requires the help of a few tools to optimize your development process and build a performant, scalable application. More specifically, you’ll need to use tools to set up a local development environment, manage APIs, code efficiently, and ensure version control. Additionally, specific libraries and frameworks tailored for React and WordPress integration will streamline your workflow and enhance the overall development experience.
If you’re looking for the assistance of technical experts in the field, you can submit your project to Codeable and hire an expert to help you with this process. Our skilled WordPress developers are adept in web development with such tools. They’ll even help you with everything from plugin creation or customization to website design and development.
On the other hand, if you are interested in learning more about what it takes to build your website with WP and React, here are the tools you’ll need and why you’ll need them:
For WordPress setup and API management
WordPress, by default, includes the WordPress REST API as a standard feature in all up-to-date versions. This will allow you to integrate React with your WordPress website seamlessly. Moreover, plugins like WP REST API Controller can manage API endpoints through a user interface, making it easier for you to develop your WordPress website using React. For GraphQL users: The WPGraphQL plugin is required to enable GraphQL API functionality, offering an alternative to REST API with more precise data fetching capabilities.
For development environment and version control
Localhost tools, such as XAMPP or MAMP, will enable you to create and test your WordPress website locally without affecting your live site. Once you are happy with the changes, you can deploy the website to your live server.
Code editors like Visual Studio Code and Xcode provide syntax highlighting, autocompletion, and extension support, which are useful features you’ll need when coding with React. Additionally, a version control system like GitHub will keep your code organized across multiple iterations.
React development tools
Node.js provides the JavaScript runtime environment that powers your React development workflow. When you install Node.js, you automatically get npm (Node Package Manager), your go-to tool for installing React libraries and managing project dependencies.
The create-react-app package, for example, makes getting started incredibly straightforward. Instead of spending hours configuring build tools, this npm package sets up everything you need with a single command, creating a ready-to-use React project structure.
For connecting your React app to WordPress, you’ll want the Axios library. This popular tool simplifies making HTTP requests to your WordPress REST API, handling the data exchange between your frontend and backend smoothly.
Behind the scenes, Babel works as a JavaScript compiler, automatically converting your modern JavaScript and JSX code into versions that all browsers can understand. The good news? Tools like create-react-app handle Babel configuration for you, so you can focus on building rather than configuring.
React frameworks and boilerplates
These play a crucial role in developing your React app because they will provide ready-to-use tools, standards, and templates to facilitate your development process. Some popular React frameworks include Frontity, Faust, Gatsby, and Next.js. Gatsby and Next.js are React frameworks designed explicitly for generating static sites and rendering content on your server. On the other hand, Frontity and Faust are designed to work with WordPress and have pre-built components and libraries that can help you create your modern and responsive headless CMS site quickly and easily.
You might need any of these tools while building your application with React and WordPress.
Setting up WordPress React (Headless WordPress with React as the frontend)
This step-by-step guide will walk you through setting up a React project that renders WordPress post data using the REST API:
Step 1: How to create a new project with React
- Install Node.js and npm: Ensure you have Node.js and npm installed on your computer.
- Install required packages: You’ll need the create-react-app package to set up a new React project. If you don’t have it installed, you can install it globally using npm:
npm install -g create-react-appFor REST, you’ll need to install Axios, an HTTP client through which you can make requests. Install it via npm install axios, and import it into your project using import axios from axios.
For GraphQL, the HTTP client is Apollo, which you can install via npm install @apollo/client graphql and import adding import { ApolloClient, InMemoryCache, gql, useQuery } from '@apollo/client'; to your project.
- Create a new React project: Create a new React project using the command below. Make sure to replace
my-react-appwith your preferred project name:
npx create-react-app my-react-app- Navigate to your project directory by running the following command:
cd my-react-app- Start the development server: Run the following command to start your React development server:
npm startYour new React app should now be running on http://localhost:3000.
Step 2: How to render post data on React (REST API + GraphQL options)
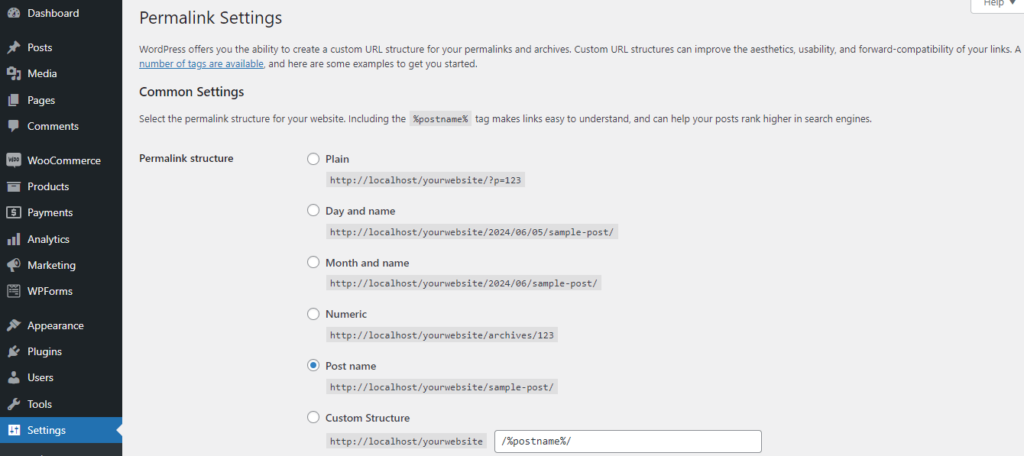
- Set up WordPress REST API: Ensure your WordPress site has the REST API enabled by logging in to your WordPress site’s admin panel and navigating to Settings > Permalinks. Ensure that your permalinks are enabled and set to something other than Plain. This is the easiest way to get the REST API to function properly.
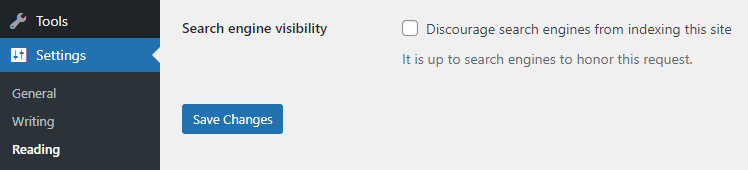
Then, go to Settings > Reading. Scroll down to the bottom of the Reading Settings page. You should see an option labeled Discourage search engines from indexing this site. Ensure that this option is unchecked. If it is checked, it can prevent the REST API from working as expected.
- Confirm that the REST API is enabled: To check if the REST API is enabled and working properly, access it directly in your browser. Open a new browser tab and enter the following URL:
http://your-wordpress-site/wp-json/wp/v2/posts
Replace your-wordpress-site with the URL of your WordPress site. If the REST API is enabled, you should see a JSON response containing information about your WordPress posts.
- Create a component to fetch your WordPress posts using
fetch():
// src/components/PostList.jsimport React, { useEffect, useState } from "react";const PostList = () => {const [posts, setPosts] = useState([]);const [loading, setLoading] = useState(true);const [error, setError] = useState(null);useEffect(() => {fetch("http://localhost/yourwebsite/wp-json/wp/v2/posts").then((response) => {if (!response.ok) {throw new Error("Network response was not ok");}return response.json();}).then((data) => {setPosts(data);setLoading(false);}).catch((error) => {setError(error);setLoading(false);});}, []);if (loading) return <p>Loading…</p>;if (error) return <p>Error: {error.message}</p>;return (<div>{posts.map((post) => (<div key={post.id}><h2 dangerouslySetInnerHTML={{ __html: post.title.rendered }} /><div dangerouslySetInnerHTML={{ __html: post.content.rendered }} /></div>))}</div>);};export default PostList;
- Update your App.js file: Open the src/App.js file in your project and replace the content with the following code so it can use the component we just created:
import React from "react";import PostList from "./components/PostList";const App = () => {return (<div><h1>WordPress Blog Posts</h1><PostList /></div>);};export default App;
Alternative: Using GraphQL with WPGraphQL
- For advanced users seeking more efficient data fetching, you can add GraphQL support to WordPress through the WPGraphQL plugin. GraphQL allows you to request exactly the data you need, reducing over-fetching and improving performance for complex applications.
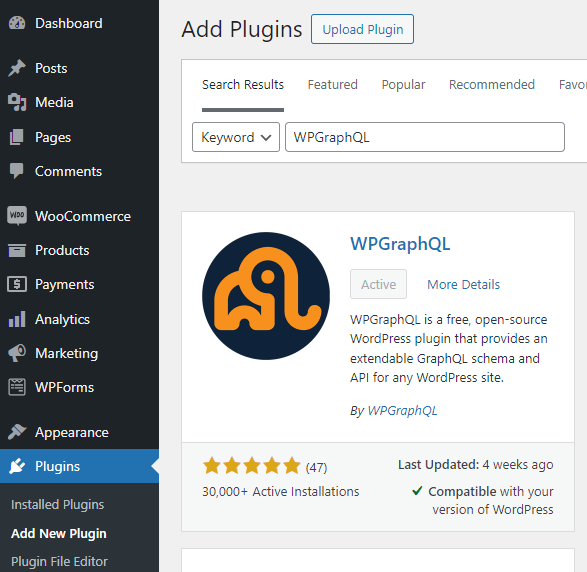
- Install and activate the WPGraphQL plugin: Go to your WordPress admin panel > Plugins > Add New Plugin. Search for WPGraphQL, click Install Now, then Activate.
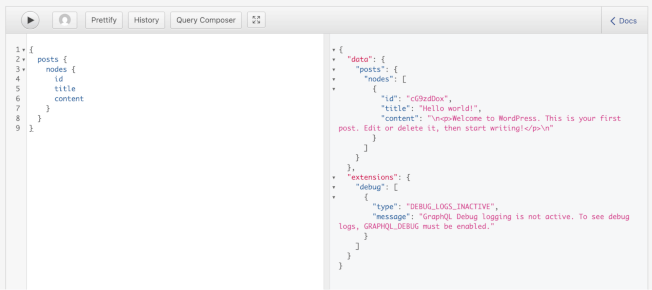
- Test the GraphQL endpoint: Go to /wp-admin/tools.php?page=graphql-playground in your WordPress admin and run this query to confirm posts are available:
{posts {nodes {idtitlecontent}}}
If the plugin’s working as intended, you should see a result with your blog posts:
- Set up Apollo client: Create a new file apolloClient.js in your React project and add the following code to it:
import { ApolloClient, InMemoryCache } from '@apollo/client';const client = new ApolloClient({uri: 'http://your-wordpress-site.com/graphql', // replace with your site URLcache: new InMemoryCache(),});export default client;
- Render post data: Create a new file Posts.js to fetch and render the post data:
- Render the post component: In src/index.js, wrap your app with ApolloProvider and render the Posts component:
import React from 'react';import ReactDOM from 'react-dom';import { ApolloProvider } from '@apollo/client';import client from './apolloClient';import Posts from './Posts';ReactDOM.render(<ApolloProvider client={client}><Posts /></ApolloProvider>,document.getElementById('root'));
Choose the approach that fits your needs: REST API is perfect for getting started quickly and works well for most WordPress-React integrations. Consider GraphQL when you need precise data fetching, have complex content relationships, or want to minimize data transfer for performance optimization.
Step 3: Styling the posts
Now it’s time to add some basic styling to your posts. You can do this in two ways:
- Manually, using CSS by creating a PostList.css file and importing it in PostList.js.
- Using ready-made style libraries and frameworks like React Bootstrap, Material-UI, Semantic UI React, or Tailwind CSS.
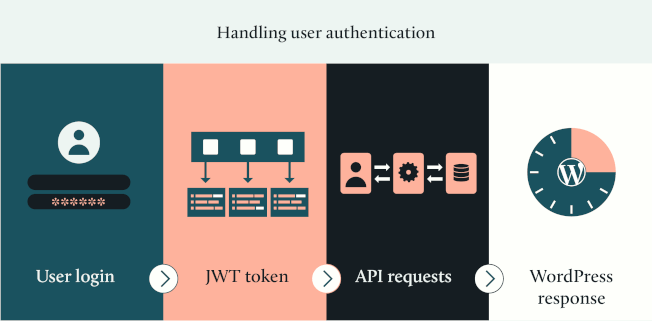
Step 4: Handling user authentication
When building a React frontend for WordPress, you’ll often need to handle user authentication for protected content or user-specific features. WordPress doesn’t include JWT (JSON Web Tokens) authentication by default, so you’ll need to install a plugin like JWT Authentication for WP REST API.
First, install and activate the JWT authentication plugin in your WordPress admin.
Next, configure your site to support JWT. First, add the following to wp-config.php, replacing your-strong-secret-key with something strong and random:
define('JWT_AUTH_SECRET_KEY', 'your-strong-secret-key');define('JWT_AUTH_CORS_ENABLE', true);And add the following to .htaccess, under the RewriteEngine On line:RewriteCond %{HTTP:Authorization} ^(.*)RewriteRule ^(.*) - [E=HTTP_AUTHORIZATION:%1]
Then, add these authentication functions to your React app:
import React, { useState } from "react";const JWTAuth = () => {const [token, setToken] = useState(localStorage.getItem("token") || "");const [username, setUsername] = useState("");const [password, setPassword] = useState("");const [posts, setPosts] = useState([]);const login = async () => {const res = await fetch("http://localhost/your-site/wp-json/jwt-auth/v1/token", {method: "POST",headers: { "Content-Type": "application/json" },body: JSON.stringify({ username, password }),});const data = await res.json();localStorage.setItem("token", data.token);setToken(data.token);};const fetchPosts = async () => {const res = await fetch("http://localhost/your-site/wp-json/wp/v2/posts", {headers: { Authorization: `Bearer ${token}` },});const data = await res.json();setPosts(data);};const logout = () => {localStorage.removeItem("token");setToken("");setPosts([]);};return (<div>{!token ? (<><input onChange={(e) => setUsername(e.target.value)} placeholder="Username" /><input type="password" onChange={(e) => setPassword(e.target.value)} placeholder="Password" /><button onClick={login}>Login</button></>) : (<><button onClick={fetchPosts}>Get Posts</button><button onClick={logout}>Logout</button>{posts.map((post) => (<div key={post.id} dangerouslySetInnerHTML={{ __html: post.title.rendered }} />))}</>)}</div>);};export default JWTAuth;
This setup allows your React app to authenticate users and access protected WordPress content using secure JWT tokens.
Advanced WordPress-React techniques
There are several advanced ways you can integrate React into a WordPress website. Choosing from the following top approaches will depend on your goals and preferences for your WordPress website.
Creating a custom WordPress theme using React
Creating a custom WordPress theme using React can be highly beneficial for developing modern, interactive, and performant websites. This approach is particularly advantageous for projects where a high degree of interactivity is needed.
To build a WordPress theme using React:
- Create a new folder in wp-content/themes for your custom theme.
- Add a style.css file with required theme info and a blank index.php file.
- Create a functions.php file to enqueue your React build files.
- Build your React app using Create React App, or similar.
- Run the build command (e.g.
npm run build) to generate static files. - Copy the build output (JS, CSS, etc.) into your WordPress theme folder or point to it.
- Use
wp_enqueue_script()in functions.php to load your main React bundle. - Add a
<div id="root"></div>in index.php for React to mount on. - In your React app, fetch content from the WordPress REST API (e.g.
/wp-json/wp/v2/posts). - Use React components to display WordPress data inside the root
div. - Activate the theme in the WordPress admin dashboard under Appearance > Themes.
Create a custom Gutenberg block using React
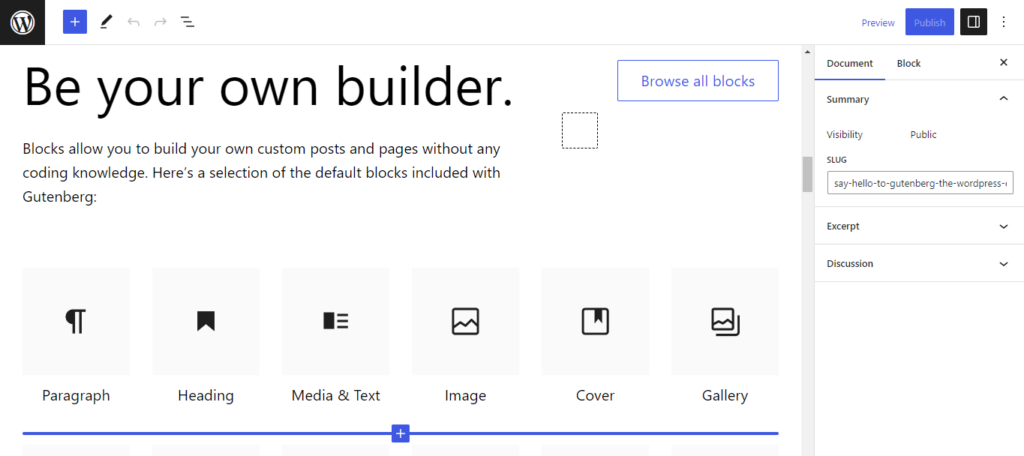
Creating custom Gutenberg blocks using React is a powerful way to extend the WordPress block editor’s capabilities. It allows developers to provide tailored, reusable, and interactive content elements that enhance the user experience and maintain consistency across a site.
Leveraging React’s strengths, developers can efficiently build and manage complex UI components, ensuring that their WordPress sites can meet specific requirements and deliver high-quality content presentation. Here’s how:
- Create a new WordPress plugin or theme folder to house your custom block code.
- Initialize a new npm project inside the folder.
- Install the @wordpress/scripts package, which provides helpful scripts for building blocks.
- Create a PHP file (e.g., my-custom-block.php) to register your block with WordPress
- Use the register_block_type function and point it to the compiled JS file for your block.
- Set up your block’s React component. Create a src folder and add your main block JS file, e.g., index.js.
- Create your block’s edit and save functions that return JSX.
- Register the block in the registerBlockType function then compile your block’s JavaScript.
- Add a build script to your package.json that uses wp-scripts.
- Run npm run build to compile your block’s JS to the build folder.
- Enqueue your block’s assets
- Create a block.json file to define your block’s metadata
- Specify the path to the compiled index.js file like so, for example:
{"apiVersion": 2,"name": "custom-namespace/custom-block-name","title": "Custom Block","category": "widgets","icon": "exampleicon","editorScript": "file:./build/index.js"}
That covers the basic setup! You can now activate your plugin/theme, and your custom React-powered block should appear in the block inserter in the WordPress editor.
eCommerce integration with WooCommerce
Building a React frontend for WooCommerce stores opens up possibilities for creating modern, fast-loading eCommerce experiences.
WooCommerce provides a comprehensive REST API that allows your React app to handle products, orders, customers, and payments. Start by installing WooCommerce and generating API keys from WooCommerce > Settings > Advanced > REST API.
Here’s how to fetch and display publicly accessible WooCommerce products in your React app:
import React, { useEffect, useState } from "react";const ProductList = () => {const [products, setProducts] = useState([]);useEffect(() => {fetch("http://your-site.com/wp-json/wc/v3/products?consumer_key=ck_xxx&consumer_secret=cs_xxx").then((res) => res.json()).then((data) => setProducts(data));}, []);return (<div>{products.map((product) => (<div key={product.id}><h2>{product.name}</h2><p dangerouslySetInnerHTML={{ __html: product.price_html }} /><img src={product.images[0]?.src} alt={product.name} width="150" /></div>))}</div>);};export default ProductList;
For cart functionality, you’ll want to use WooCommerce’s Store API or implement custom endpoints. This approach gives you complete control over the shopping experience and maintains WooCommerce’s powerful backend features like inventory management, payment processing, and order fulfillment.
Performance, SEO, and cost considerations
When considering integrating React into a WordPress site, it’s important to choose the approach that will be efficient for your website needs based on the following aspects:
Existing infrastructure
The infrastructure you have in place can affect compatibility, scalability, development time, and cost. Choosing an approach that is compatible with your existing infrastructure can help ensure a smoother and more efficient development process.
For example, a headless setup may be more efficient for your website needs. However, it requires more development effort, backend changes, expertise, and resources.
Maintenance and updates
Regular maintenance and updates are crucial when developing a website using React with WordPress. They benefit your website’s performance, security, and stability. Compatibility and security vulnerabilities may arise without regular updates, resulting in a poor user experience and potential site crashes. The headless setup puts a spin on the process, as frontend and backend updates are separate.
Developer skillset
Building your website with WordPress and React is a time-consuming process with a steep learning curve. A proficient React developer should have strong knowledge of JavaScript ES6+, an understanding of JSX syntax, experience with state management libraries like Redux or Context API, and familiarity with modern front-end build tools like Webpack and Babel. Additionally, expertise in RESTful APIs and asynchronous programming (e.g., Promises, async/await) is essential.
Development costs and budget planning
Given these skill requirements, React development costs vary significantly based on project complexity. Simple WordPress-React integrations might cost $5,000-$15,000, while complex headless setups can range from $20,000-$50,000 or more.
Factors affecting cost include design complexity, custom functionality requirements, third-party integrations, and whether you’re building from scratch or enhancing an existing site. Hourly rates for React developers typically range from $50-$150, depending on experience and location.
To have easy access to these skills, hiring an expert on a project basis via Codeable simplifies this process.
SEO considerations
SEO is important for your website’s discoverability and ranking in search results, which can increase your conversion rates and profit. When using React with WordPress, it’s important to consider how it will affect SEO, such as how search engines will crawl and index your content.
React’s impact on SEO primarily revolves around its handling of dynamic content. Since React uses client-side rendering by default, it can cause issues for search engines that struggle to index JavaScript-heavy content.
Server-side rendering (SSR) addresses these concerns by generating HTML on the server before sending it to browsers. Frameworks like Next.js provide built-in SSR capabilities, while Gatsby offers static site generation (SSG). They both significantly improve SEO compared to client-side rendering alone. SSR also improves initial page load times and provides a better user experience, especially on slower connections.
Moreover, ensuring that metadata, sitemaps, and canonical URLs are properly configured in your headless WordPress setup is crucial. A headless architecture may require extra planning to implement these SEO best practices effectively.
When to get expert help
Integrating React with WordPress can be complex. Here’s how to determine whether to go it alone or hire professional developers.
1. Consider your technical needs
High-complexity features typically require expert help, including custom user authentication and role management, real-time functionality like live chat or notification systems, payment processing and eCommerce integration, complex state management across multiple components, and custom API integrations with third-party services.
2. Assess your resources
Learning React, WordPress APIs, and modern development workflows can take months for beginners. If you’re facing tight deadlines, lack JavaScript experience, or find yourself stuck on basic setup tasks, hiring experts accelerates your timeline significantly.
Professional developers also bring experience with testing, deployment strategies, and troubleshooting complex integration issues that could otherwise derail your project. They provide the architectural foundation and documentation necessary for ongoing maintenance, security updates, and future scaling.
3. Evaluate long-term needs
Professional developers provide architectural planning, comprehensive documentation, and maintenance strategies that become essential as your site grows. They handle testing frameworks, security best practices, and deployment processes that ensure your application remains stable, secure, and scalable over time.
Expert WordPress-React development with Codeable
Combining React with WordPress creates powerful, modern web applications, but the technical complexity can be overwhelming without proper expertise.
Codeable’s network of WordPress specialists includes developers experienced in React integration, headless WordPress setups, and custom component development.
Ready to build your WordPress-React application? Submit your project to Codeable today and get matched with expert developers who specialize in modern WordPress development.
 Dream It