Switching to WordPress is like trading in your flip phone for the latest flagship smartphone – not just an upgrade to what you know, but a leap into a whole new world of power, flexibility, and possibilities you didn’t realize you were missing.
Whether you’re migrating from static HTML or another CMS, it’s a complete transformation. WordPress offers unparalleled customization, with a thriving ecosystem of plugins, themes, and tools that let you build a site as simple or sophisticated as you need. From personal blogs to massive eCommerce stores, WordPress grows with you.
But let’s be honest: the level of effort depends on where you’re starting and how much of your current site you want to bring along. Migrating from another CMS or builder can range from simple to technical, especially if you’re aiming to preserve your design, content, and/or functionality.
In this guide, we’ll break down the migration process – from quick, no-frills solutions to deep-dive rebuilds – so you can tackle the transition with clarity and confidence. Let’s get started.
What you need to get started
To convert your site to WordPress, you need the right tools and preparation, starting with a WordPress hosting plan. This is the backbone of your site, providing the environment where WordPress runs. A good host, like WP Engine or Kinsta, ensures speed, reliability, and support, ideally with features like one-click WordPress installation and automatic updates to make your life easier.
You’ll also need a code editor, and no, Notepad won’t cut it. The conversion process can get complex, especially if you’re migrating a static HTML site or tweaking custom functionalities.
For this, you’ll need more robust tools like Visual Studio Code or PhpStorm. These editors offer features like syntax highlighting, error detection, and integrated project management – key for handling the intricate tweaks that often come up in WordPress migrations.
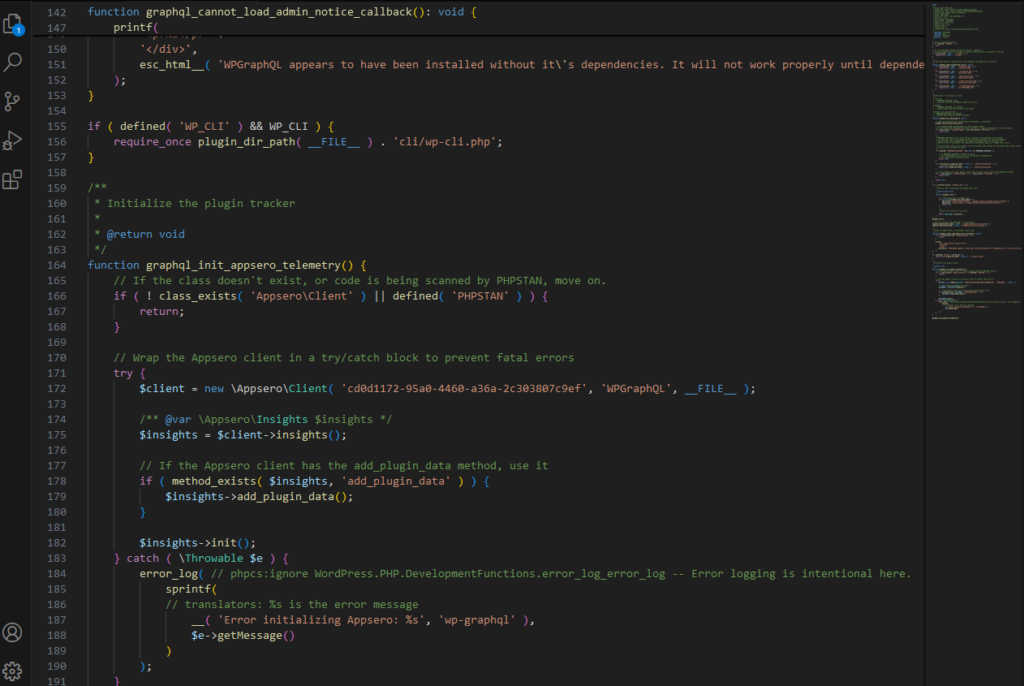
Unlike simple text editors, these full-fledged Integrated Development Environments (IDEs) are built for large-scale projects, which makes them indispensable if you want to avoid headaches down the road.
Lastly, back up all your content and images. You’ll need these files to migrate your posts, media, and designs. This isn’t just about keeping your stuff safe (although, obviously, do that); it’s about having it ready to transfer without hassle.
Organize images, posts, and static assets so they’re easy to migrate, whether manually or with add-ons. This step is important if you want your WordPress site to retain the same look, feel, and functionality you’re used to – or better.Most hosting platforms offer a way to export all your site’s assets, so you should consult the support team or documentation. Otherwise, you can export everything yourself using the wp export command in WP-CLI or the Duplicator plugin.
Method 1: Create a WordPress website from scratch and manually migrate your content
Manually moving to WordPress by copying over your content one post at a time might sound tedious, but it’s an approach that has its place. This method is ideal if you’re running a smaller site or blog with a manageable number of posts or if you’re ready to rethink your content organization entirely.
It’s also a solid choice when you want a clean break – leaving behind outdated formats, messy code, or unnecessary clutter from your old platform.
The process is straightforward. Here’s how to manually copy a blog post:
1. From your WordPress admin dashboard, go to Posts > Add New Post. This should open the Block Editor, a very intuitive interface for working with content.
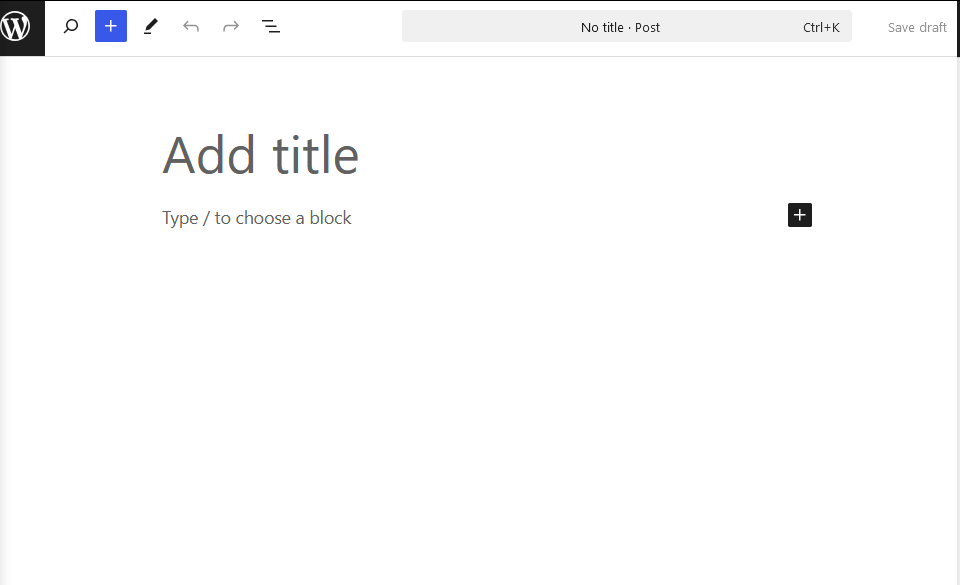
2. Paste in your title and text in the appropriate areas. To insert additional elements like images or video, skip to a new paragraph and hit / or the + icon.
3. With all your content copied in, click on the Settings icon at the top right of the page. Under the Post tab, you can customize the featured image, excerpt, link, categories, tags, and more. You can even schedule when the post goes live! We did promise you new possibilities.
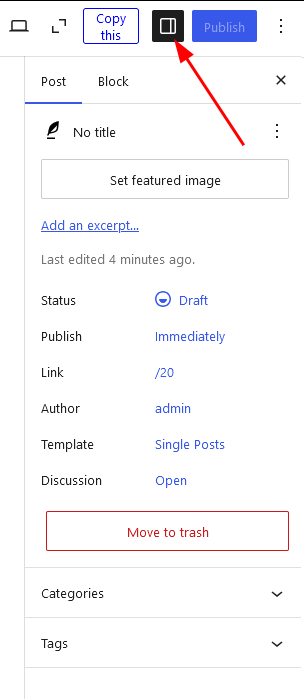
4. When you’re done, hit Publish, and you should be able to view the post on the site!
5. Rinse and repeat for all your existing content.
While basic, this approach allows you to review, edit, and refine each piece of content as you go, ensuring everything looks and feels right on your new site. It’s also an opportunity to align your posts with WordPress’s modern block editor, which can give your content a visual upgrade.
However, this method isn’t for everyone. The drawbacks are obvious:
- It’s incredibly time-consuming, especially if you have a large number of posts or pages to migrate.
- You’ll lose important metadata, such as publishing dates, authorship, and SEO settings, unless you re-enter them manually.
- No automated backups of your old content structure, meaning errors or omissions could easily go unnoticed until it’s too late.
- Recreating media placements can be tedious, as images and files need to be uploaded individually and relinked in each post.
- It doesn’t scale well, making it impractical for larger or more complex sites with hundreds of posts or intricate layouts.
Method 2: Use a child theme adapted from an existing theme
Using a child theme adapted from an existing WordPress theme is a powerful way to move your site to WordPress while maintaining control over design and functionality.
A child theme inherits all the features and styling of its parent theme but allows you to make customizations without affecting the original codebase. This method is perfect for users who want a site tailored to their needs but aren’t ready to build from scratch.
You can do this using plugins like Child Theme Configurator and WP Child Theme Generator, or you can do it yourself. If you choose the latter option, fire up that code editor we told you to get and follow these steps:
1. Choose a parent theme that closely matches the design and functionality you want.
2. Create a new folder in your WordPress themes directory (wp-content/themes) and name it something like yourtheme-child.
3. Inside the folder, create a style.css file and add the required header, specifying it as a child theme and linking to the parent theme:
/*Theme Name: Your Theme ChildTheme URI: http://example.com/your-theme-childDescription: A child theme for the Parent ThemeAuthor: Your NameAuthor URI: http://example.comTemplate: parent-theme-folderVersion: 1.0.0*//* Add your custom styles below this line */
4. Add a functions.php file and use the code below to enqueue the parent theme’s stylesheet to ensure styles are inherited:
<?php// Enqueue the parent theme stylesheetfunction yourtheme_child_enqueue_styles() {wp_enqueue_style('parent-style', get_template_directory_uri() . '/style.css');}add_action('wp_enqueue_scripts', 'yourtheme_child_enqueue_styles');?>
5. Activate the child theme in your WordPress dashboard under Appearance > Themes.
With your child theme ready, you can make customizations in its style.css or add PHP functions in functions.php without editing the parent theme directly.
The advantages are clear:
- It allows you to tweak designs, layouts, and features with minimal risk.
- It preserves the parent theme, so updates for security and performance don’t affect your customizations.
- It provides an efficient way to achieve a unique look with the stability of a professionally built theme.
However, this approach isn’t entirely without challenges:
- It requires an understanding of programming, specifically CSS and PHP, to make the most of it.
- It relies on the parent theme, so issues may arise if the parent is poorly coded or abandoned.
For those willing to invest a bit of time in learning the basics of WordPress theming, using a child theme is an excellent middle ground. It balances customization with ease, letting you build a tailored site without reinventing the wheel.
Method 3: Create a WordPress theme from your HTML site
Converting your HTML site into a custom WordPress theme is a big step, but it’s also incredibly rewarding. This method is ideal if you love the design of your current site but want to add the power and flexibility of WordPress.
Instead of settling for a pre-made theme, you take your existing static HTML and turn it into a fully functional, dynamic WordPress theme. It’s the ultimate way to retain your design while gaining all the benefits of WordPress.
To make it work, you’ll need to break your HTML into modular components that WordPress can use – header, footer, sidebar, and main content area. Then, you’ll add PHP functions to connect these elements to WordPress’s backend.
This method does require some real technical knowledge, but it gives you complete control over your theme. If you didn’t think you needed your code editor before, you’re really going to need it now.
For detailed step-by-step theme creation instructions, see our comprehensive guide to converting HTML to WordPress themes.
Here’s a high-level overview of the process:
1. In your WordPress installation, navigate to wp-content/themes/ and create a new folder for your theme.
2. Inside your theme folder, create the following files:
a. style.css – contains theme metadata and styles.
b. index.php – the main template file.
c. header.php – contains the site’s header section.
d. footer.php – contains the site’s footer section.
e. sidebar.php – contains the sidebar content.
3. Open your HTML files and copy the content into the appropriate WordPress files. For example:
a. The <head> section goes in header.php.
b. The main body content goes in index.php.
c. Any sidebar elements go in sidebar.php.
4. Add WordPress template tags. Incorporate WordPress functions like get_header(), get_footer(), and wp_head() into your template files to enable dynamic content and plugin support.
5. Upload your theme folder to the WordPress themes directory and activate it via the WordPress dashboard.
This method:
- Requires knowledge of HTML, CSS, and PHP to create and manage effectively.
- Can be more time-consuming compared to using a pre-made WordPress theme.
- Puts the responsibility on you to maintain compatibility with future WordPress updates.
Method 4: Use a plugin to import HTML content into your WordPress website
If you’re not ready to go all-in on a custom WordPress theme, a plugin like WP File Manager offers a simpler path to integrating your static HTML pages into WordPress.
It’s the perfect compromise when a full conversion feels excessive.
Say you’ve got a basic static site with a few landing pages – maybe an about page, a services section, and a FAQ – but you want to add a blog or dynamic features. Instead of rebuilding everything, you can import those pages as they are and let WordPress handle the new, more flexible parts of your site.
Sure, you’ll need to import each page one by one, but this method is straightforward and much more beginner-friendly than diving into theme development.
Here’s how to do this using WP File Manager (but remember, file manager plugins expose write access, so it’s best practice to disable it after migration and restrict access roles for security):
- Open the plugin by clicking WP File Manager from the menu on the left.
- Go to the root folder of your WordPress installation and create a new folder there. Give it a name that will appear as the slug for the page when it’s live.
- Drag and drop the assets for the static page into the folder and save. To speed up this process, add them as part of a zip file and unzip them using WP File Manager when they’re uploaded.
Now, when you visit yoursite.com/name-of-folder, you should see the static page!
This simple method offers some obvious benefits:
- Quick and simple for smaller sites, especially when you only need to import a few static pages.
- Preserves your existing design, allowing you to maintain the look and feel of your original site.
- No advanced coding skills required, making it accessible to beginners.
- Lets you add dynamic features like a blog or contact forms alongside your imported static pages.
- Works as a stepping stone, giving you a WordPress-powered site without starting from scratchting from scratch.
On the flip side, you can see where it falls short:
- Time-consuming for larger sites, as each page must typically be imported individually.
- Imported pages remain static, lacking the flexibility of WordPress templates.
- Limited scalability, making it less practical for complex or evolving websites.
- May require manual adjustments, such as fixing broken links or formatting issues after the import.
- Doesn’t fully integrate with your design, leaving some parts of your site outside WordPress’s dynamic system.
It’s a pragmatic way to get the best of both worlds: keeping your existing design while stepping into WordPress’s ecosystem for what comes next.
Method 5: Work with a WordPress developer to handle the process for you
Unlike DIY methods, a WordPress developer brings expertise to the table, meaning they don’t have to stick to a single approach.
Whether it’s customizing a theme, creating one from scratch, or efficiently importing your content, they’ll find the solution that best fits your site and goals.
This method is especially ideal for complex migrations. If your site has custom functionality, unique design requirements, or a lot of content to bring over, a developer can handle it without breaking a sweat.
They’ll ensure everything works as it should in WordPress, from preserving your SEO structure to making sure your design translates beautifully.
And while you might assume a developer would do everything manually, the reality is they’ll use their knowledge to streamline the process – whether it’s by using migration tools or automating repetitive tasks.
A WordPress expert gives you peace of mind by:
- Delivering customized solutions, ensuring your site’s design, features, and functionality align perfectly with your goals.
- Handling complex migrations effortlessly, preserving your SEO, design, and custom elements without any hassle.
- Saving time and eliminating frustration, as they take care of all technical challenges and troubleshooting.
- Using expert tools and strategies, making the migration faster, smoother, and more efficient than DIY approaches.
- Ensuring a polished, professional result, giving you a WordPress site that’s fully optimized and future-ready.
However, this option isn’t for everyone – it comes with a cost, and you’ll need to communicate your needs and expectations clearly. Still, for anyone who values efficiency and expertise, working with a developer can be the smartest way to move your site to WordPress.
Convert your HTML site to WordPress with Codeable
Converting your site to WordPress opens the door to a world of possibilities, whether you’re upgrading from static HTML, migrating from another CMS, or starting fresh.
The process can range from straightforward to overwhelming, depending on your goals and technical expertise, but that’s why Codeable exists.
As a trusted platform connecting you with top WordPress experts, Codeable takes the guesswork out of finding a professional who can handle your migration with precision.
Whether you need a simple import, a custom theme, or a full-featured redesign, Codeable’s vetted developers are ready to bring your vision to life. And to make sure your WordPress website continues to stay performant and secure once it’s been set up, Codeable’s Retainer service gets you regular maintenance services from an experienced WordPress expert. Save time, avoid frustration, and ensure your site is built to thrive with WordPress. Don’t just take a leap of faith – set yourself up for success with Codeable. Submit your project today!

20 000+ businesses of every shape and size have already trusted us to hire WordPress developers and scale their growth.
 Dream It

