Before we dig into this rather lengthy tutorial, let me apologize. This is part three (see parts one and two) and it’s taken me several months to finally write it, for two reasons: First, as the founder of the company, my presence and attention was needed elsewhere, and second, I wanted our website to run on this set up for a while, so that I was sure what I’ll write is going to have good, reliable and performant outcome.
Also, since we’ll be using Google Cloud to deploy this solution, be warned that we will be spinning up a couple of relatively small virtual servers, which does come with a cost of a few dollars (for the duration of you running these servers to follow the tutorial), so make sure that you delete them all after we’re done. The good news is that if you never used Google Cloud before, you’re given a $300 bonus by Google to try it out!
Let’s get started!
What is Kubernetes
Kubernetes, in short, is a container orchestration tool. That means it does all the heavy lifting to make sure our containers are running properly, destroys the unneeded ones or spins up new ones, makes sure that traffic routing is correct between them and a number of other, useful things, most of which need to be done manually in the traditional server administration world.
Why not Docker Swarm? Well first, because I have absolutely no experience with it, and second, because Kubernetes is becoming the market leader when it comes to container management. For a good reason too, since it’s an open-source project by Google, a company that knows a thing or two about server technologies and hurdles they bring.
There are several entities (which in Kubernetes, are defined with the use of yaml files) that we’ll be referring to and using throughout this tutorial that is worth mentioning in advance but will likely become much more familiar once we put them to use:
podis Kubernetes’ primary entity, so to speak. It’s almost analogous to Docker’s container, the only difference being we can have multiple containers within one pod. For now, thinkpod == containerdeploymentis how we control pods. Its meaning somewhat differs from the traditional meaning of the word, because it’s not a process but rather a configuration snippet with which we define how many pods (also called replicas in this context) of a certain kind we need, how much resources we want to allocate to each and a slew of other responsibilities.servicesis how we expose certain kind/group of pods either internally to be connected from other pods or externally to the internet. Services are among the simplest entities to define.secretsare an entity that holds, you guessed it, secrets, such as passwords and API keys. In Kubernetes, we consume secrets by mounting them onto a pod, under a certain path, let’s say/etc/secrets(could be anything). Then ourDB_SECRETis stored as a string inside/etc/secrets/DB_SECRET.endpointsare an automatically managed entity. We normally don’t need to define them ourselves because Kubernetes does it when we define aservice, but there are exceptions, such as when we want a service to route to an external server which Kubernetes is not aware of. We will use this approach in our tutorial (hint: forwp-content).nodeis a physical machine or a virtual server on which aKubeletis running. Kubelet is a Kubernetes worker process that communicates with its master about the state of the node, and all other entities. When our stack is up and running, all the pods are on worker nodes, master just keeps track of everything and delegates work. Like a boss.ingressis – despite its somewhat exotic name – a simple domain routing configuration object. With it, we tell Google’s (or own) load balancer which domain should be routed to which service and port.
Confused? Don’t worry, it will all make much more sense soon!
Setting up Google Cloud
We will use Google Cloud to set up our Kubernetes stack, the primary reason being we don’t need to take care of the Kubernetes master node ourselves – Google does it for us.
To proceed, first log in to Google Cloud console and fill out all the details, which should result in you coming to the console dashboard:
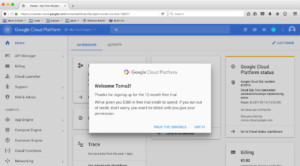
Here, navigate to Container Engine and create your first container cluster; Feel free to name it whatever you like and pick the zone closest to you, but make sure to choose the micro machine type and leave the size at 3 nodes. In a real world scenario, we would, of course, choose bigger capacities.
Also, note the image field, it says cos. It stands for container optimized os which is Google’s Linux, specifically built for containers and based on the open source Chromium OS project.
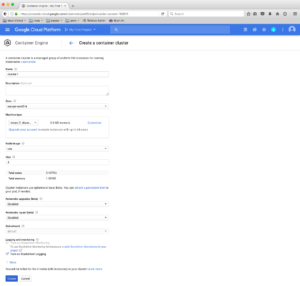
Click Create and wait a couple of minutes so that our cluster comes online.
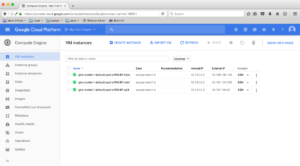
We can now check our virtual machines up and running by navigating to Compute Engine -> VM instances:
With our cluster setup, we now need to step back and consider our final stack a little. The challenge we’re facing with WordPress running in multiple containers is how much (or more importantly, what) we want those containers to share and how. First, there’s wp-config.php that is custom to every WordPress install, and then there’s wp-content. In my opinion, it makes sense to bake the former directly into the image in a way that allows us not to have the need to touch it – ever. As I’ve shown you in the previous tutorial, we can make it read environment variables, rather hard coding values.
The second part is significantly more complicated. We need all our containers to share the same wp-content, which means we have to set up a network disk on which that directory will be stored.
Luckily, there’s a solution for that called GlusterFS which Kubernetes supports out of the box, and it’s fairly trivial to set up!
On the page with your instances listed, click Create instance and again, select the micro type of the machine and put it in the same zone as your container cluster. Name it gluster-1.
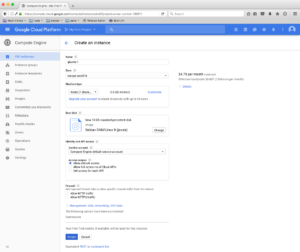
Create the instance and while it’s setting up, create yet another, with exactly the same settings, but name it gluster-2.
Yes, we will need two GlusterFS instances, for two reasons: first, so we have redundancy in place, and second, for educational purposes 🙂
Your VM instances screen should now look like this:
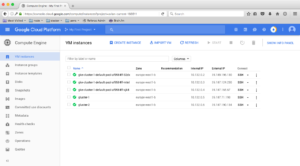
If you paid attention during instance creation from the previous couple paragraphs, you may have noticed the cost of each instance is roughly $4/month, which means this setup will cost us about $20 per month, which is not expensive at all! Granted, for production you’ll most likely need more powerful instances, but you should be able to get the full stack up and running with less than $100/month. Yes, this isn’t a setup for a simple blog, but when you need availability and performance, it’s a reasonable cost.
Setting up GlusterFS
Now it’s time to get our hands a bit dirty!
To proceed, you’ll first need to install Google SDK, which will let you connect to any of the instances through the shell. I won’t describe setting it up here since the official documentation includes a step-by-step guide to get it running properly.
Once you’re done setting it up, make sure you can list your instances through the shell:
$ gcloud compute instances list.
If you’re unable to do that, it means you haven’t authenticated through the shell yet, so run
$ gcloud auth login [email protected]
and confirm the login in the browser.
Then, set the current active project:
$ gcloud config set project your-project-id (you can find your project id by clicking the My First Project in the top navigation bar in cloud console).
Now you can run the list instances command again and you should get something similar to this:
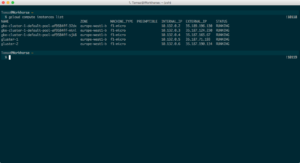
Now, open two separate tabs in whatever program you use to run shell, because we will configure both GlusterFS instances at the same time: In your browser, click the SSH arrow icon and choose View gcloud command, which you then need to copy into one of your shells, each instance into its own one.
For me, one of them looks like this:
$ gcloud compute --project "avian-current-168511" ssh --zone "europe-west1-b" "gluster-1"
Before we set up GlusterFS, let’s make sure both nodes are up to date and have GlusterFS installed. Run these commands on both of them:
$ sudo -ito switch to the root account$ apt-get updateto update apt repositories$ apt-get install -y apt-transport-https$ wget -O - https://download.gluster.org/pub/gluster/glusterfs/3.11/rsa.pub | apt-key add -to install GlusterFS’s public RSA key (change3.11for the rigtht version)$ echo deb https://download.gluster.org/pub/gluster/glusterfs/LATEST/Debian/jessie/apt jessie main > /etc/apt/sources.list.d/gluster.list(make sure your distro is correct)$ apt-get update$ apt-get install -y glusterfs-server$ ps aux | grep gluster$ mkdir -p /data/brick1
With GlusterFS installed, it’s now time to configure it. It’s worth noting that there is no notion of Master/Slave nodes, all servers are called peers since a client that mounts a GlusterFS volume can connect and read/write to any of them.
Let’s go back to our cloud console and check the internal IP addresses of our GlusterFS nodes as we will need to connect them between one another. In my case, the IPs are 10.132.0.5 (lets call this node gluster-1) and 10.132.0.6 (gluster-2).
On gluster-1, run
$ gluster peer probe 10.132.0.6
and on gluster-2, run
$ gluster peer probe 10.132.0.5
We probed both instances between each other, meaning they are now aware of one another but don’t serve any volumes yet, so let’s do that next.
On both nodes, create the directory that will be served as a single, but replicated volume, called wp-content-site1 (replicated means that a particular directory is always in sync on both nodes). I recommend you to use a slightly more specific name because you’ll probably want to have multiple websites mounting wp-content from the same GlusterFS nodes (don’t worry about WordPress at this point, we can mount this volume into our installed WP under a completely different name). To create the directory, run
$ mkdir -p /data/brick1/wp-content-site1
Almost there! With both nodes having their directories, all we have to do is create a GlusterFS volume. On gluster-1, run the following commands:
$ gluster volume create wp-content-site1 replica 2 10.132.0.5:/data/brick1/wp-content-site1 10.132.0.6:/data/brick1/wp-content-site1 force$ gluster volume start wp-content-site1$ mkdir -p /mnt/wp-content-site1$ mount -t glusterfs 10.132.0.5:/wp-content-site1 /mnt/wp-content-site1$ touch /mnt/wp-content-site1/test.txt
Let’s go through what we just did. First, we created a new volume, which is replicated across both nodes and used force parameter, otherwise GlusterFS would complain that it prefers to have volumes on external disks. Then we started the newly created volume, which means external clients can now connect to any of the two nodes to mount the volume onto themselves. In fact, in step 4 we did just that, we mounted the volume through GlusterFS onto the node itself. (Note: don’t confuse /data/brick1/wp-content-site1 and /mnt/wp-content-site1 – the former is what GlusterFS uses as it’s filesystem, whereas the latter we just mounted to try out the volume, we could skip this step). Lastly, we created a test file on gluster-1 which should now also be listed on gluster-2 if we ran $ ls /data/brick1/wp-content-site1.
You could now unmount /mnt/wp-content-site1, but let’s leave it as it is, because it’s this directory we will use as our wp-content (feel free to exit out of the shell on gluster-2 – you won’t need it anymore).
So before closing gluster-1 shell, let’s download WordPress and extract wp-content:
+ $ cd /mnt/wp-content-site1
– $ wget https://wordpress.org/latest.tar.gz
– $ tar -zxf latest.tar.gz
– $ mv wordpress/wp-content/* .
– $ rm -rf wordpress latest.tar.gz
– $ chown -R 1000:1000 .
Note that in the future, if you need to make any adjustments on wp-content, this is the directory you will make them in and changes will be automatically propagated to both nodes correctly. Also, note we’ve set permissions to user/group that has UID/GID 1000 – that’s because our WordPress image has www-data user and group set to the same ID, thus we avoid any possible permissions issues down the line.
That’s it, feel free to close the shell, our GlusterFS cluster is now properly configured and ready to be mounted into as many Kubernetes pods as we like!
Setting up MySQL
Luckily, Google Cloud comes with their hosted MySQL offering, which makes setting it up very straightforward, literally just a couple of clicks.
In Cloud console, navigate to SQL (click the hamburger icon on top right, if the menu isn’t visible) then choose Create instance. On the following page, select MySQL and then Choose Second Generation.
The following screen should be familiar by now:
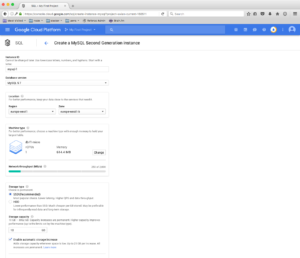
Feel free to select the same type of machine as we did for all other services: db-f1-micro. As the interface will probably warn you, this machine isn’t covered by Google’s SLAs, but is perfectly fine for testing and development, which is what we’re doing here anyway.
Choose the location of the instance in the same Region/Zone as your container cluster, to minimize network latencies.
Google’s MySQL supports failover replication out of the box, you just have to check the checkbox Create failover replica, but we will not use one for now – we can always come back and create it later, while the master instance is running.
Finally, create a root password (don’t forget to save it somewhere safe) for your MySQL and click Create at the very bottom. After a couple of minutes, your instance should be ready, so proceed to check it out by clicking on the instance name (mysql-0 in my case).
There’s nothing to do here for now, but you can return to this page, later on, to add a replica, do backups and check its performance.
Before we continue with setting up Kubernetes, you only need one more thing: a Service Account. These are special types of accounts, used by services, rather than people, and come with some additional details, like private keys and roles.
To create a service account navigate to the Service accounts page (under IAM & Admin in the main navigation), click Create service account and fill the form out like this:
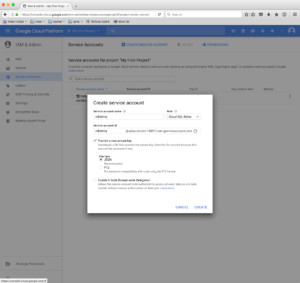
(Make sure to select both: Cloud SQL Client and Cloud SQL Editor)
After clicking Create, a JSON file will be automatically downloaded; Store it somewhere safe, and remember where it is, because you will need it shortly.
Our WordPress will use this service account to provide connection to our MySQL instance (for increased security), so we also need to create an SQL user that will be attached to the service account. To create one, first list the instances in your shell, like this:
$ gcloud beta sql instances list
and create the MySQL user (change the values as needed):
$ gcloud beta sql users create wp_user cloudsqlproxy~% --instance=mysql-0
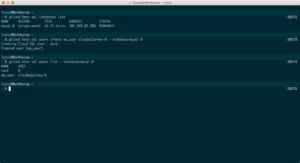
Finally, create the database:
$ gcloud beta sql databases create wp_tutorial --instance=mysql-0
There’s no need to grant any specific permissions because all users you define have access to all databases on the same instance. While this may seem like a bad idea, have in mind that this is an advanced setup and controlled entirely by you. We achieve security with other means, namely by using a proxy hostname (meaning no outside connection can be made to our MySQL instance) and a service account (meaning no fiddling with passwords).
You’re now all done with setting up MySQL, time to finally deploy our WordPress!
Setting up Kubernetes
Since we’ll be doing most of Kubernetes configuration through the command line, we first need to install the command kubectl, which is part of the gcloud suite of tools:
$ gcloud components install kubectl
Then, log in to Google Cloud and set up common settings (change the timezone and project ID according to your setup)
$ gcloud auth application-default login, which will open your browser to allow you to authorize your shell$ gcloud config set project avian-current-168511to set the current active project$ gcloud config set compute/zone europe-west1-bto set the timezone$ gcloud container clusters get-credentials cluster-1to save your settings in a local file
Your kubectl command should now be available and connected to the correct cluster. To verify, run $ kubectl get pods --all-namespaces which should return something like this:
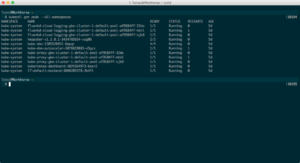
As I mentioned earlier, a pod is similar to a container, and here you see a bunch of them under the kube-system namespace, which are automatically created by Google Container Engine and needed to run the cluster properly, so you might want to leave them alone 🙂
Secrets
For our WordPress to run properly, we first need to set up a couple of secrets, the most important one being MySQL access credentials.
Remember the service account file we created earlier (named something like my-project-name-12345.json)?
Now is the time to use it; Copy it over into your project directory, rename it to credentials.json and run:
$ kubectl create secret generic cloudsql-instance-credentials --from-file=credentials.json
To verify your secret being properly deployed, run $ kubectl edit secret cloudsql-instance-credentials. This will open an editor (vim, most likely) with a single key in your data, called credentials.json and the value being contents of your original credentials file, base64 encoded.
While this may look confusing at first, it makes sense. Like I mentioned earlier, when secrets are consumed by Kubernetes they are mounted into the filesystem as regular files, which Kubernetes decodes automatically, which you’ll see how shortly. Close vim by pressing :q (colon, then q).
The secrets we just created will be used by our CloudSQL proxy pod (explained shortly), but not our WordPress, so we need to create another set of secrets that WordPress can’t run without. Namely, salts.
In your project directory, create a new one, and name it k8s (short for Kubernetes) and put the following file inside, named wordpress-secrets.yml:
[gist https://gist.github.com/tomazzaman/5639efa1cf694f629008345e35a12baf#file-wordpress-secrets-yml /]
Like the file suggests, you need to convert each of WordPress salts and keys (generated here into their Base64 encoded values, which is done with this command:
$ echo 'a-bunch-of-gibberish-here' | base64
Once all the values have been defined, deploy the secrets file:
$ kubectl create -f wordpress-secrets.yml
Now delete it, you won’t need it anymore and it contains sensitive data you don’t want mistakenly shared or committed to a Git repo.
Shared wp-content
Before we deploy WordPress, we need a way to access our GlusterFS volume we created earlier. As per official documentation on services, we need to create a service without selectors and a corresponding set of endpoints.
Create two new files in your k8s directory named glusterfs-service.yml and glusterfs-endpoints.yml and put the following content in:
[gist https://gist.github.com/tomazzaman/5639efa1cf694f629008345e35a12baf#file-glusterfs-endpoints-yml /]
[gist https://gist.github.com/tomazzaman/5639efa1cf694f629008345e35a12baf#file-glusterfs-service-yml /]
To verify the service has picked up correct endpoints, run $ kubectl get svc and $ kubectl describe svc glusterfs. If you see correct endpoint IPs like the following screenshot it means our cluster is ready to connect to GlusterFS:
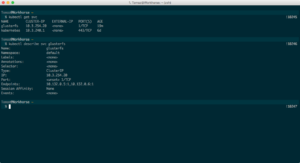
Don’t worry about the port (1), it’s just a placeholder port because services can’t exist without defining one.
Deploying WordPress
With all our dependencies up and running, it’s now time to finally deploy WordPress. Again, create a new yaml file, name it wordpress-deployment.yml and put the following content in it:
[gist https://gist.github.com/tomazzaman/5639efa1cf694f629008345e35a12baf#file-wordpress-deployment-yml /]
While this file may seem a bit intimidating at first, updating it becomes second nature once you figure out what’s what.
Let’s go over it to clarify:
- Line 4: The name of this deployment
- Line 6: How many replicas (pods of the same type) we want to run on this stack, in our case 3.
- Line 9: One of the deployment’s responsibilities is running any given number of replicas we define. Labels serve as Kubernetes’ way to monitor pods’ states. In our case it observes all pods labeled with
app: wordpress. - Line 10: When we deploy a new version of WordPress, how do we want the deployment to roll it out? We can either destroy old pods first, then create new ones, or we can do a Rolling Update, which deletes one pod, creates a new one with a new version and deletes one more old pod, again replacing it with one with a new version, and so on, until all pods have been updated. Most of the time, this is the preferred way, since we always have pods that are available to the internet, preventing any downtime during our deployment.
- Line 15: The template (and subsequently
spec->containerson lines 19 and 10) is the most important part of the deployment. It serves as a blueprint for all created pods. - Line 21: First container in our pod is the WordPress container (but not the official one, I’m using my own, hence
image: codeable/kubepress:4.7.5) - Line 35: livenessProbe is Kubernetes’ way of checking whether our pod is properly running. If not it will prevent sending any traffic to it and attempt to restart it.
- Line 49: Expose port 80
- Line 52: Mount the secrets we created earlier into
/etc/secretsand our GlusterFS volume into/var/www/wordpress/wp-content - Line 58: Our second container in this pod is created by Google for the purpose of connecting to CloudSQL, so feel free to read this document how it works. What’s worth noting here is that containers in the same pod share logical localhost (don’t confuse it with the host virtual machine that’s running the Kubelet, though – it’s still an isolated environment), which is why we’re connecting to
127.0.0.1:3306in our WordPress pod. - Line 65: Which MySQL instance do we want to connect this pod to. To get it, run
$ gcloud beta sql instancesthen$ gcloud beta sql instances describe mysql-0(changemysql-0with your instance name) and locateconnectionName. - Line 78: Here we define all the volumes that either of our pods want to consume. Here, you can see our GlusterFS volume and
cloudsql-instance-credentialsdefined. Note how thenameof each volume matches the one involumeMountson lines 54, 56 and 71? That’s not a coincidence, so watch out for typos.
The moment of truth:
$ kubectl create -f wordpress-deployment.yml (make sure to update line 65!)
This will create 3 identical WordPress pods:
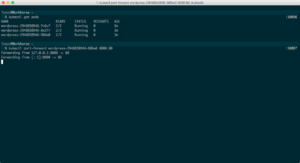
Now, we can’t access our WordPress though a domain or an IP yet, since we haven’t exposed the pods to the internet, but we can still try it out! Run $ kubectl get pods, choose one of them (doesn’t matter which one) and run $ kubectl port-forward wordpress-pod-name 8080:80. This will map pod’s port 80 to port 8080 on your computer, so you can now open your browser, navigate to http://localhost:8080 and install WordPress!
Debugging and logs
If, for any reason, any of your pods misbehave once you set them up, there are a few commands that can provide to be immensely useful to investigate what’s going on:
$ kubectl logs wordpress-498979938-258sjwill output the logs of any given pod. If the pod is being in a restart loop, then you might want to add--previousto the command. Alternatively, visit Google’s log page to inspect them from within the browser$ kubectl exec -ti wordpress-498979938-258sj bashwill connect to the pod’s shell, much like SSH.$ kubectl delete pod wordpress-498979938-258sjwill delete the pod and, since we’re using a deployment, automatically create a fresh one in its place.
Exposing WordPress to the internet
The official tutorial suggest of creating a service of a type LoadBalancer to expose the port on our pods, but that’s actually not the best practice, for several reasons:
- We have no control over what IP the services will be exposed on
- We need to take care of SSL termination ourselves, adding either another layer of complexity we need to maintain or an additional responsibility to our image
- We can’t expose multiple domains on the same IP
- Our logs won’t show proper visitor IPs but rather our service’s internal one
So what we need to do instead, is create a service, of a type NodePort. This type of services maps our container port 80 to all nodes in the cluster regardless if the container is on a particular node or not to an arbitrary port, higher than 30000.
[gist https://gist.github.com/tomazzaman/5639efa1cf694f629008345e35a12baf#file-wordpress-service-yml /]
Save this file into your k8s directory, and run $ kubectl create -f wordpress-service.yml.
To verify the service created the necessary endpoints, run $ kubectl get svc,ep. If you see something like the following screenshot, then the service properly routing traffic from nodes’ port 31586 (in my case, your may differ) to the pods’ port 80.
So how do we now expose them to the internet? We’ll use what’s called an ingress. Similar to a service, ingress instructs Kubernetes master how to route traffic, the major difference being that ingress is responsible for mapping external traffic, based on a set of rules we define.
In your k8s directory, create a new file, called wordpress-ingress.yml and put the following contents in (update the domain):
[gist https://gist.github.com/tomazzaman/5639efa1cf694f629008345e35a12baf#file-wordpress-ingress-yml /]
Now before we can actually visit the domain to verify our WordPress up and running, we need to fix two gotchas:
- in our DNS settings (with our domain registrar), we need to create an A record, pointing to the IP that Google allocated to ingress. Run
$ kubectl describe ing wordpressand find a field, named Address. - Since we installed WordPress through
port-forwardearlier, WordPress will most likely want to redirect us to port8080, which won’t work. So edit the deployment ($ kubectl edit deploy wordpress) and add two new environment variables (somewhere around the line45in ourwordpress-deploy.ymlfile):WP_SITEURLandWP_HOME, both should be set to the final domain (includinghttp://). Save and quit the file to update deployment and give Kubernetes a couple of seconds to deploy a new set of pods with these new settings in place.
Our whole stack is now properly configured, and we should be able to visit the domain in our browser to see our shiny new WordPress installation up and running!
We’re pretty much done, but let’s explore in our Google cloud dashboard what just happened.
Visit the load balancing page and click the only load balancer there to expand the view. There’s a whole lot of things going on in there:
- there’s a frontend defined, which is an IP and port we accept traffic on
- there are rules defined (which we did with our ingress)
- there is a backend defined (which Google did for us)
I encourage you to edit this load balancer configuration and click around a bit to get a feeling how things fit together – I won’t explain it in details here as this tutorial is quite long as it is, and Google’s official documentation can be a good source for further learning.
Also, if you’d like to keep this new IP that Google has allocated to the ingress, visit the external IP addresses page and change the IP from Ephemeral to Static.
Bonus: Letsencrypt with Kube-lego
Now that our stack is fully up and running, adding a deployment that takes care of our SSL termination and registration of certificates only takes a couple of additional commands.
We will use Kube-lego for both of the tasks since it’s a widely used and battle-tested approach to handling certificates on Kubernetes clusters.
The first thing we need is a ConfigMap. In Kubernetes, ConfigMaps are used, as the name suggests it, for configuration. The “map” part of the name stands for combinations of keys and their values. Since Kube-lego by default uses Letsencrypt’s staging servers, our configmap needs to include the production server URL and our email address.
[gist https://gist.github.com/tomazzaman/5639efa1cf694f629008345e35a12baf#file-lego-configmap-yml /]
Save the file to your k8s directory and run
$ kubectl create -f lego-configmap.yml
(Note that the official Kube-lego documentation uses kube-lego namespace to deploy entities, but I found it more clear to use it on the kube-system namespace where all other system-related entities are)
With the configuration in place, it’s time to deploy Kube-lego:
[gist https://gist.github.com/tomazzaman/5639efa1cf694f629008345e35a12baf#file-lego-deployment-yml /]
Save the file to k8s and run
$ kubectl create -f lego-deployment.yml
Let’s verify it’s running:
$ kubectl get pods -n kube-system
You should see a pod named kube-lego-1702644611-9hnt0 (the last two strings will be different for you).
Now for the last bit, we need to modify the ingress we created earlier to let Kube-lego know which domains we want certificates for.
Run $ kubectl edit ing default.
This will open your preferred editor with our original ingress significantly modified by Google (there should be a bunch of additional annotations in).
Compare it to the following gist:
[gist https://gist.github.com/tomazzaman/5639efa1cf694f629008345e35a12baf#file-wordpress-ingress-tls-yml /]
You’ll notice it’s missing a couple of parts, so fill them in:
- Two new annotations:
kubernetes.io/ingress.class: gceandkubernetes.io/tls-acme: "true" tlskey (which is an array) withhosts(also an array) andsecretNamedefined
Save the file and exit. Since our Kube-lego pod automatically observes our ingresses, there’s no need to do anything else, it will pick up the updates, request the necessary certificate from Letsencrypt and reconfigure the load balancer on its own.
That’s it, visit the URL you used to set up this whole stack with https prepended and enjoy your newly acquired set of skills! (By the way, a tweet to this article would be much appreciated.)
I’ve been getting a lot of requests for this article and I’m thinking of organizing a live webinar/session in which I will stream this whole process. Let me know if you’d be interested in participating in the comments below.
 Dream It
