Many site owners think that once their website is published, their work is done. This couldn’t be further from the truth – the work has only just begun! Your site’s final purpose isn’t to exist, it is to convert visitors to customers.
Apart from funnel testing, which I described in my previous tutorial, there’s also A/B testing. The former tests the flow visitors while the latter tests individual elements’ performance on your website.
What is A/B testing
A/B testing is a process of testing anything on your website with random groups of visitors and determine which of those groups perform (convert) best. You can literally test anything: copy, colors, images, layouts or even whole pages.
- variant is an alternative piece of content/copy/design that we want to test against the control and other variants. Each test can have as many of them as you want.
- control is your your base variant, the one you’re testing all other against. It’s what you usually start with.
- statistical significance is a number (expressed in %, most commonly 95%) that tells us the likeliness of our results being correct; For example you could have 10 visitors and none would convert in variant B, while with 1000 visitors, the same variant would produce much better results. Yes, statistical significance depends on the number of visitors undergoing the test – the higher, the better.
Why you should do it
Every element on our website triggers emotions, some positive and others negative but if you never do any A/B testing then you’re assuming all your site visitors enjoy the experience equally?
But is that really the case? To answer that, visit Google Analytics and check your bounce rate (it’s a % of visitors that visit your site but don’t interact with it – they just leave. The lower it is, the better).
It’s not 0%, right? In fact, it’s probably well above 30%, which means not all your visitors are enjoying your site equally do they? Do not worry though, you’ll never get down to 0, nor is that the purpose of A/B testing. Not all visitors are your target audience so bounce rate will never be 0.
The main purpose of A/B testing is increasing conversions, meaning your visitors will achieve the primary goal of your site, be it reading an article, purchasing an item or subscribing for membership.
What should I test?
Once you start with testing (or get into habit), it’s really tempting to try and test everything. Don’t do that; Instead, start with the most prominent elements: call to action buttons. Preferably, each page should only have one of those that lets the visitor know what they should do next and usually stand out visually and say something like “Start here” or “Get started” or “Sign up”.
If you don’t have those, you’re making on of the biggest mistakes a site owner can do: You’re not leading your visitors towards completing the goal of your site!
When we tested our landing page, one test struck us most; We tested our primary header button against alternative colors (the default was blue, we tested it against green and orange). The result? Orange color of that button converted 25% better than blue. Because we measure conversion from visitors to paying customers that meant instead of $100k, we were making $125k!
Well worth spending a couple of minutes setting up that test. A couple of minutes for a $25k increase in sales? Are you still sure you don’t want to A/B test? 🙂
What if I have a regular presentational website?
No problem at all, that too has a purpose right? Whether you expect your visitors to submit a contact form, make a phone call, schedule an appointment or just read your article – in every case you want to increase the chances of that happening.
Set up your first test
Note: If you’ve been following our tutorials so far, you may have noticed we use the domain www.wp-kickstart.com as our playground. It’s a basic WP install to which I added a button on the sidebar which we will use for our tutorial test.
One of the best tools for testing your site elements is called Optimizely. To start, make an account and create your first Web Project:
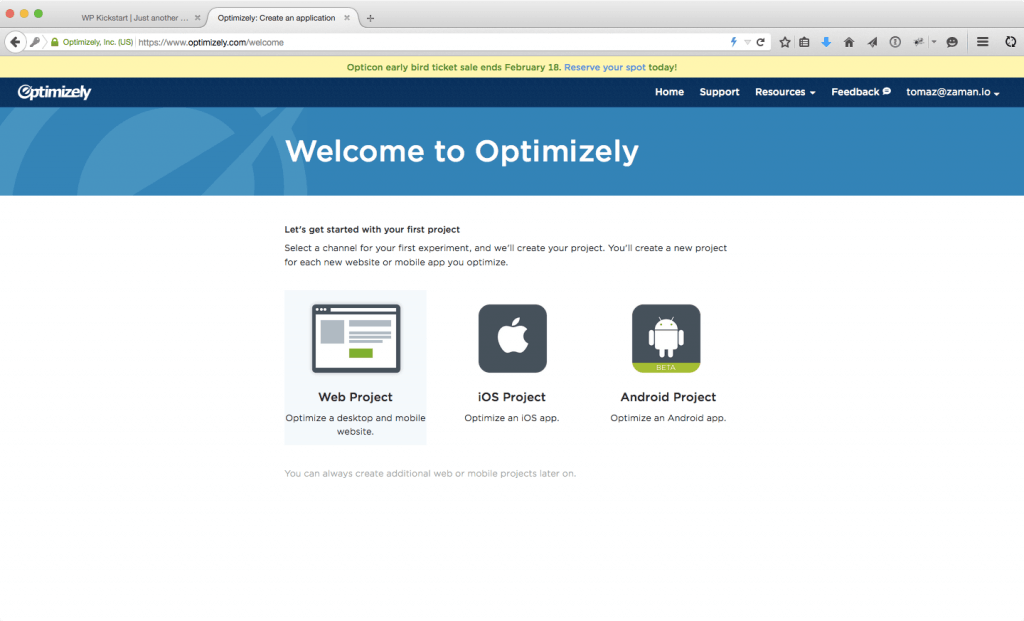
Once created, you’ll need to enter the URL of the site you want to test:
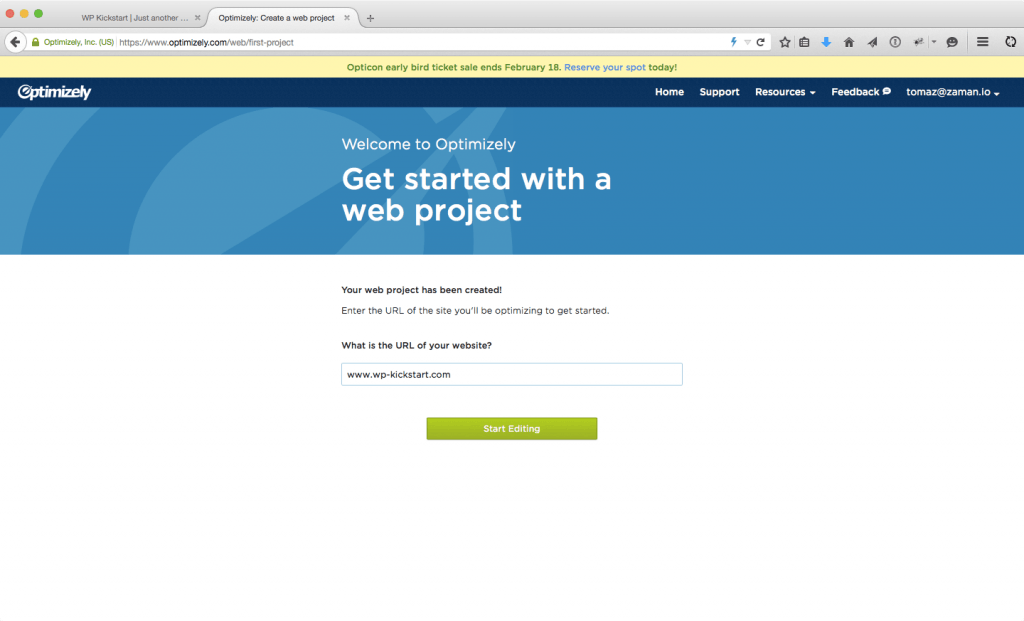
Once your project is set up, Optimizely’s editor will open which allows you to add variants and edit their elements.
There are many ways you can edit an element with Optimizely; You can change the text, it’s CSS classes or even change its HTML output. My preferable way is via CSS classes because it’s easier to test changes locally before doing the actual testing. Your mileage may vary though.
For this tutorial, I added the following CSS for this button into my style.css:
.textwidget a.button {
 text-decoration: none;
 border-radius: 5px;
 background-color: #36A9E1;
 border-bottom: none;
 color: white;
 display: inline-block;
 padding: 5px 12px;
}

.textwidget a.button:hover {
 background-color: #0092CC;
}

.textwidget a.button-primary-dark {
 background-color: #3A579A;
}

.textwidget a.button-primary-dark:hover {
 background-color: #314A83;
}
As you may have noticed we have a default class button with an alternate class (for a variant) button-primary-dark.
The default version looks like this:
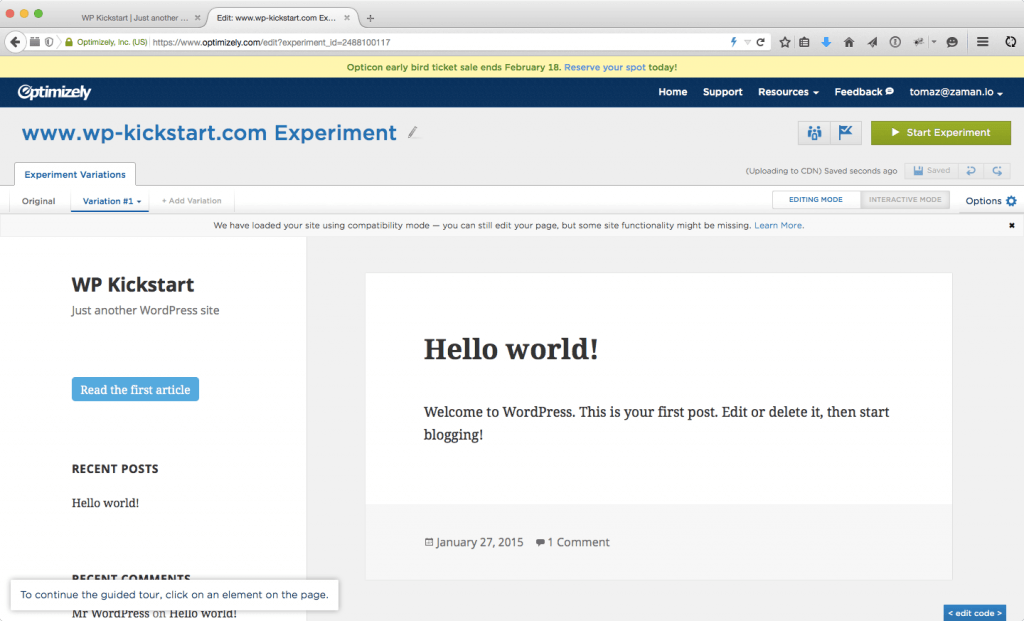
Now it’s time to build a couple of variants! For the purpose of this tutorial, I decided we will test two variants, one that has all caps and another that changes the color of the button to a bit darker blue.
Switch back to Optimizely and in Variation #1 tab (in the bar above your site), click the button you want to change, which will trigger a menu, asking what you want to do with the element. Click Edit Element, then, because we’re just changing the button copy for this first variant, click Edit Text
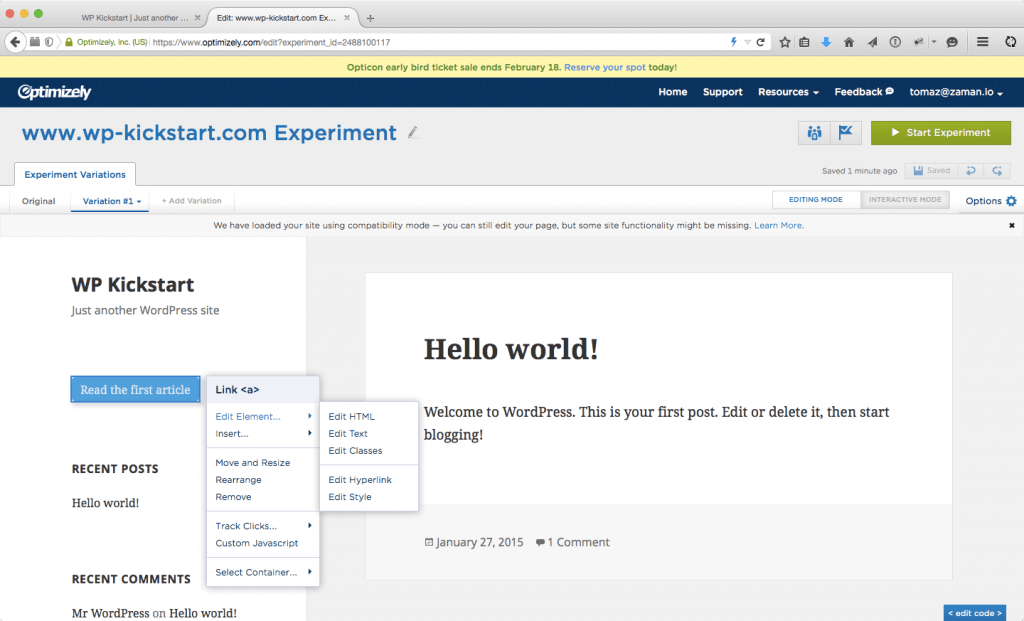
In the textarea that pops up, just rewrite the text of the button with ALL CAPS, and click Done. That’s it, you now have your first variant set up! Time for the next one.
In the Experiment Variations tab, create a new variation, then click the same button to edit, but this time, choose Edit Classes. In my case, I already have three classes on this button (button, button-primary and save), so I’m going to change the button-primary to button-primary-dark, which will immediately load the new button color.
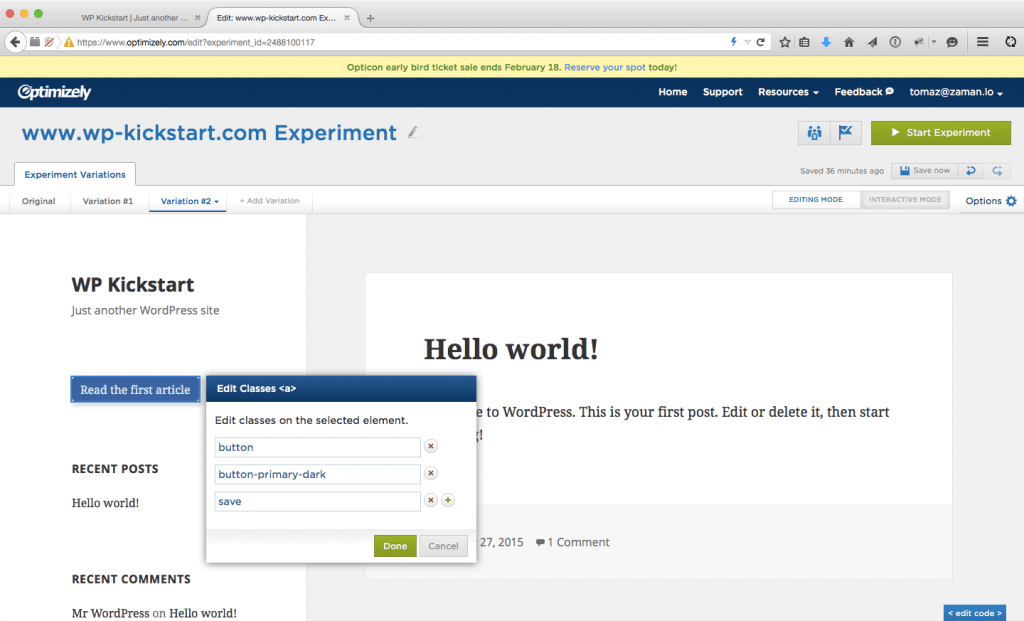
Now that your experiment is ready, start it by clicking Start Experiment in the top right corner. Once you do that, a window will open with instructions on how to implement the code snippet. In my case, I’ll just paste the code into header.php in my theme, anywhere in the <head> tag will do.
Wait for test results
Now that your test is running, it’s time to observe results. In Optimizely, click options (right hand side of screen), then select view results. Since you’re just starting out, there will be no numbers yet, so feel free to close it for a couple of days when you should start seeing the first numbers.
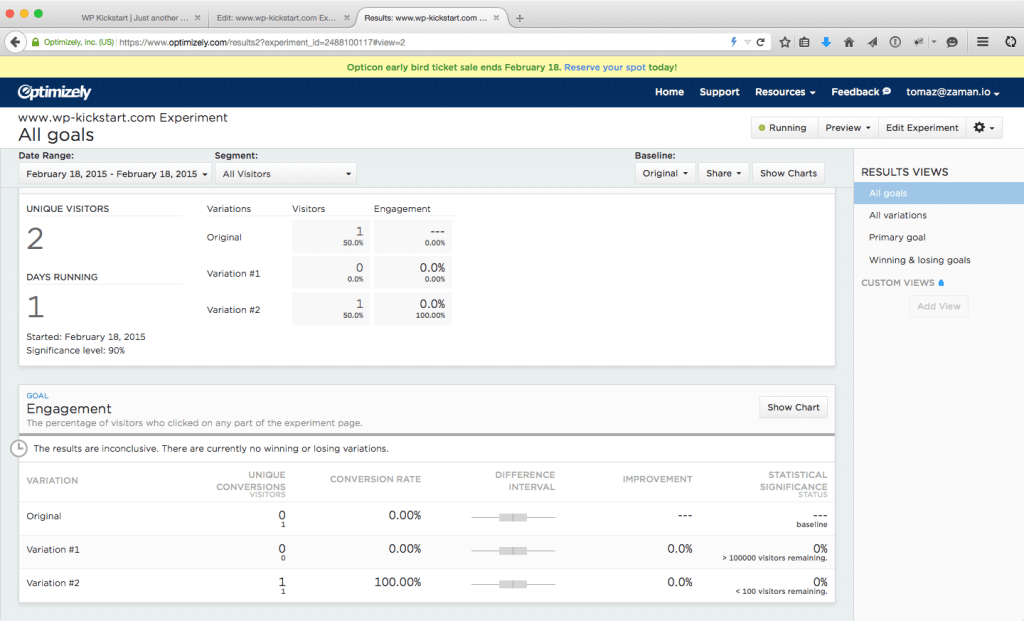
While you wait, I urge you to explore Optimizely a bit, what we done is barely scratched the surface of this powerful software which can do so much more – I’ll leave it up to you to discover what that is, and how can your business benefit from it.
Caveats
When getting started with WordPress A/B testing, it’s easy to try and test everything; Don’t do that – instead focus on the most prominent elements of your site such as navigation naming and positioning, primary buttons, contact and subscription forms, and maybe background images (if you have them).
Also make sure that within the same test you run an experiment that tests one element in different ways, otherwise you won’t know what change really attributed to increase (or decrease) of visitor engagement at the end of it.
One mistake is also not being patient enough and drawing conclusions from tests that have not achieved high statistical significance (which just takes enough visitors to undergo the test). If you don’t have a high-traffic website it may take a while for your tests to finish, and that’s okay, at least you’ll know for certain (well for 95% certain) that it was indeed your test that caused the increase of engagement.
Another problem is what I like to call “missing the big picture”, meaning that you only test small elements while having the same overall look and feel, which brings you to local maximum if you test it thoroughly. To reach a global maximum, you’d have to drastically change the position of the elements, their colors, the copy,… So what you would test is a completely new version of your page (which would, in turn, also require testing all the elements on the micro level). Only after that, you’d know you’ve achieved truly optimized page. And zen.
 Dream It
