Images are probably the most important sales tool for your online store. Customers who cannot see or touch your product “in real life” rely heavily on these visuals to make purchase decisions.
With the Zoom feature and other customizations, WooCommerce provides helpful options for spotlighting your product images. However you can, and should, start optimizing your images even before uploading them to your WooCommerce store.
Follow these easy tips to ensure perfect product images that not only meet WooCommerce requirements but also give your product images an extra professional edge.
For optimal display, follow image size guidelines
Using images in the correct size avoids issues such as blurriness and pixelation, as well as optimizing user experience on your site.
WooCommerce recommends a minimum image size of 800×800 pixels. Doing so ensures good display quality for the different image types on your store, such as single-product images, catalog images, and thumbnails.

Avoid using images smaller than the recommended size as they may look blurry or pixelated, especially when viewed in close-up using the Zoom feature.
If you have to use a small image, try using upscaling software to enlarge it to a higher resolution before uploading it to WooCommerce.
800×800 pixels is the minimum size, so you can use larger images. This may be a good idea for certain WooCommerce themes or if your images contain a lot of detail.
On the other hand, using very large images is not advised because they slow down page speed, negatively impacting user experience and SEO. For the same reason, it is preferable to use images in JPG format and avoid heavier formats such as PNG.
Choose the best aspect ratio for your pictures
In addition to size, aspect ratio also impacts how well images display on your store.
In WooCommerce, single product images display in their original aspect ratio whereas smaller thumbnail images are cropped to 1:1 by default. Therefore, it’s important to check that your product is still in the frame when cropped down as a thumbnail. An easy way to manage this is to crop all images to a 1:1 ratio before uploading them.
You can use the Customizer in WooCommerce to set the aspect ratio you want product images to display in such as 4:6, 3:2, or 16:9. Whatever the ratio used, pre-cropping images to this format can help avoid display issues.
Use a flawless background that lets your product shine
Achieving a clean background makes images look more professional and ensures that the focus stays on your product so it’s well worth the extra effort.
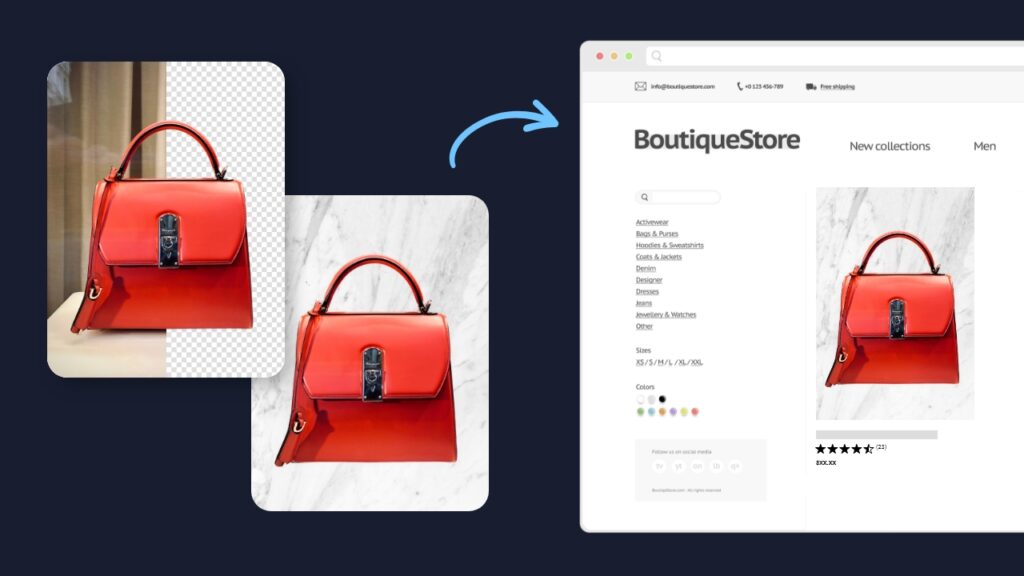
WooCommerce recommends using white or off-white backgrounds for simple product images. Photographing your products against a sweep, or even a piece of white paper can help you achieve this.
You can clean up small defects, such as dust specs, with a spot healer. For larger objects and distractions in the background, an object remover can be used, such as inPixio’s Auto Erase tool to retouch the picture.

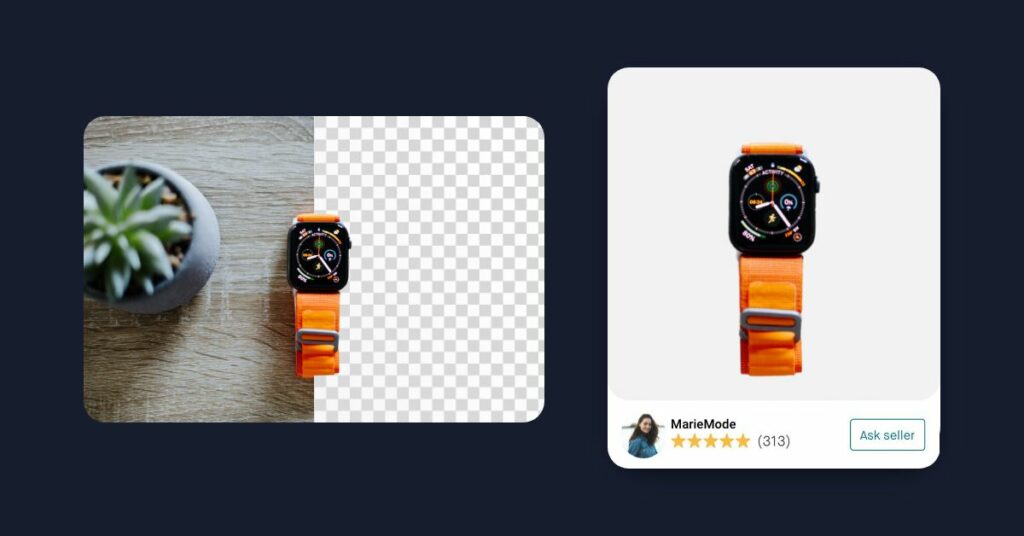
Alternatively, you can erase the entire background from your picture and replace it with a white one. AI-powered background removers select the subject of a photo automatically and delete the background in a single action, then all that’s left to do is to select a new one.
Replacing backgrounds in this way can save time and ensure a clean, consistent finish, with no dust specs or shadows. For example, you can show the same product from different angles while maintaining a uniform look for your catalog.

Show your product in its best light
Lighting can be a tricky part of product photography. If you don’t have a professional lightbox at your disposal, the best option is generally to use natural light when shooting your products.
If possible, take your photos on a slightly overcast day and always at the same time of day in order to have the best chance of consistent lighting.
If this isn’t working out, don’t worry – lighting is another aspect that can be fixed in post-production. Most photo editors offer simple sliders to adjust your images. Some also offer an auto-correct feature that finds the ideal settings for your image at the touch of a button.
Start by tweaking exposure, highlights and shadows but be careful to not overdo it. If images look washed out, you can also play with saturation and vibrance to restore them. Again, avoid over-editing photos as this can distort the true colors of your product.
Master focus in lifestyle shots
The risk with lifestyle or real-world shots is that the surroundings can distract from the image or even overpower it.
You can avoid this by carefully considering props and composition before beginning your shot. However, even with the best pre-planning, something may sneak into your photo that you’re not happy with, or you may change your mind about the setup later.
Cropping out or erasing stray objects is one way to deal with this. Another idea is to use blur. By blurring parts of the image background it is possible to keep the atmosphere of lifestyle shots while giving more focus to your main product and blending out clutter.
Many phone cameras now offer portrait mode for blurred backgrounds. Otherwise, you can easily add blur using tools and presets in most photo editors.
Make images consistent for a professional catalog
With a product catalog, consistency is key to projecting professionalism.
We already covered uniform aspect ratios and backgrounds as two tips for achieving image consistency.
When editing photos from a single shoot, it usually makes sense to apply the same settings to all images, resulting in a consistent and professional finish.
Once you find the ideal settings for things like exposure, keep a note of them in case you need to edit more similar photos later.
Finally, it’s a good idea to check the angle of your shots and straighten any pictures that look tilted.
Achieving professional pictures is easier than you think
Professional product pictures can make a big difference to your WooCommerce store and have a positive impact on sales. Fortunately, you don’t need to be an expert photographer to achieve them.
Simple editing hacks can compensate for issues during shooting. Mastering image size, aspect ratio, background, lighting, and consistency are key to making WooCommerce images that convert.
The examples in this post were edited with inPixio Photo Studio, an easy-to-use photo editor with AI-powered features such as background and object removal, auto-correction, and image effects. You can download a free trial to test out the tools and features on your own pictures.

 Dream It
